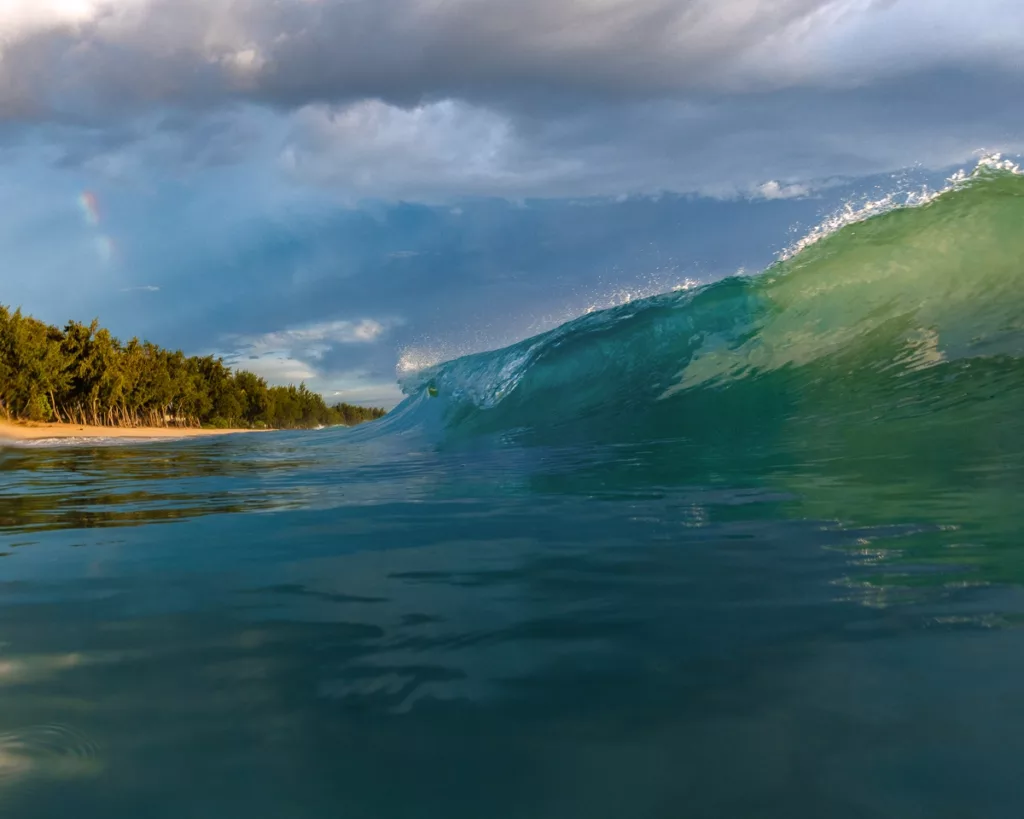
Photographing images from inside of the ocean requires a very unique set of skills. If you’re looking to venture into the wondrous world of ocean photography, you need to be mentally and physically prepared. Although this genre of photography can be considered dangerous, it can also be very rewarding. Allowing one to create memorable, one-of-a-kind images of an alien world filled with liquid. Here are some tips and tricks for photographing images from inside of the ocean. We will also go over some of the recommended equipment and post-production techniques to help jumpstart your adventure into ocean photography.
- Understand the ocean
- Choosing the right equipment
- Mentally and Physically Preparing Yourself
- Staying Safe
- Camera Settings
- Focus Settings
- Color Settings
- Awareness
- Cleaning your Equipment
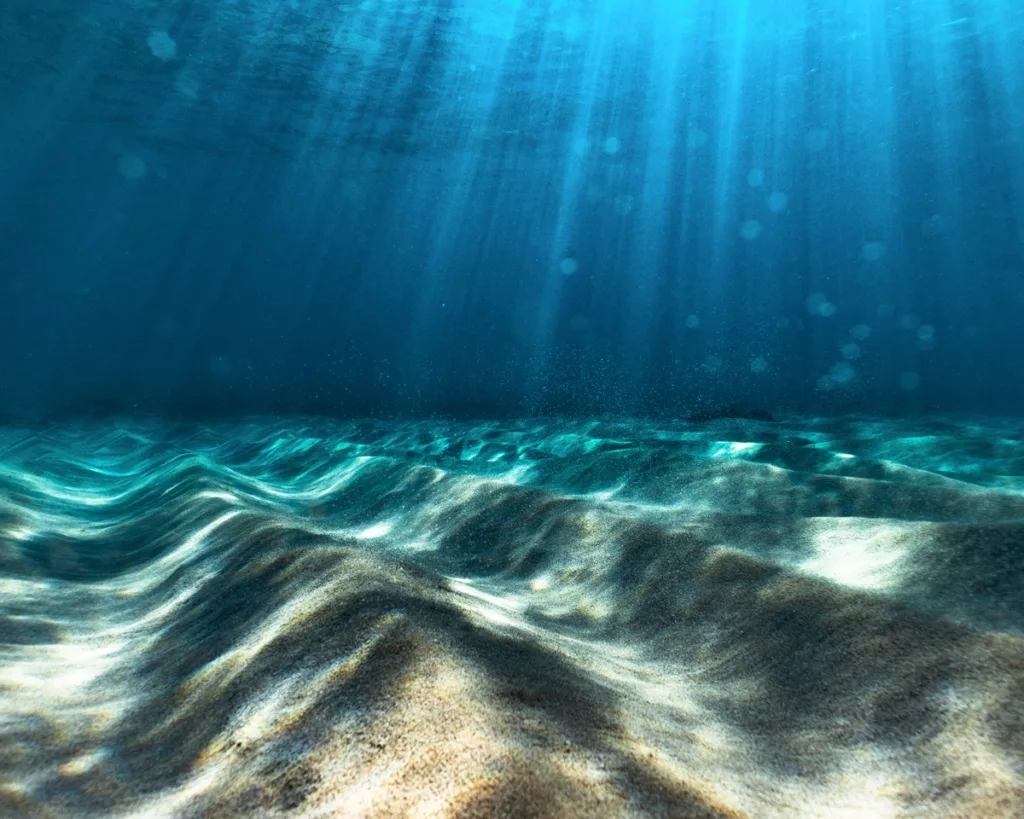
Understand the Ocean
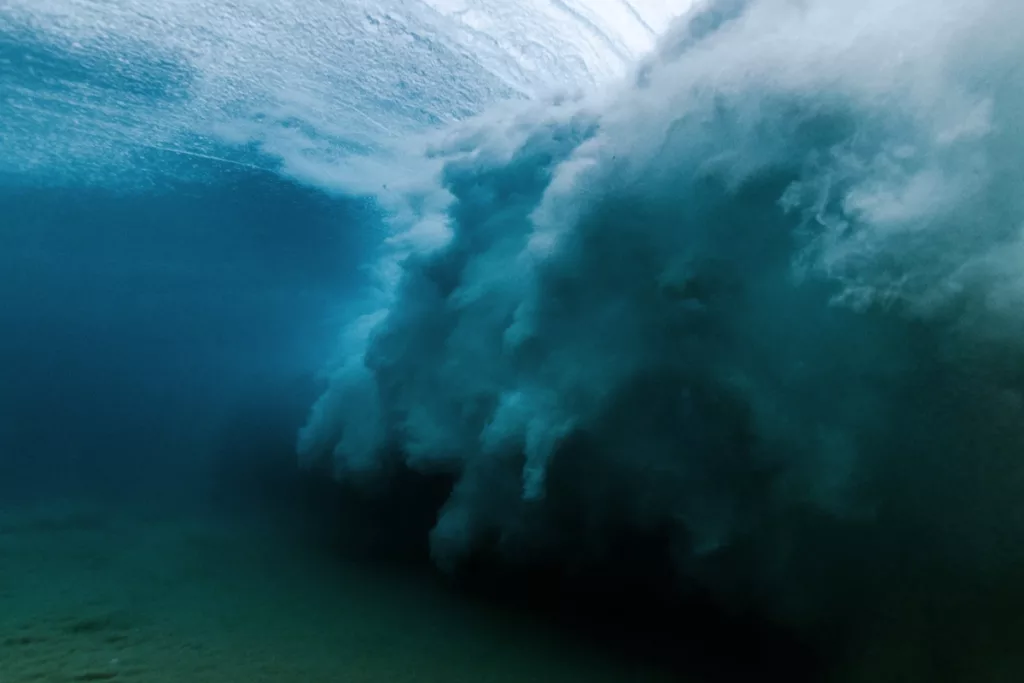
Photographing images from inside of the ocean can be dangerous, life threatening, but at the same time, very rewarding. Knowledge plays an important factor when photographing waves, marine life, or various elements of the underwater world. Always check local reports of the surf, wind and tides. In addition, any existing marine warnings. This can save you a ton of time before heading to the beach and help you make the right decisions that could end up saving your life or the life of others.
Visit Surf News Network or Surfline to get all of these reports in one place.
The unpredictability of the ocean affects even the most experienced swimmers. Familiarize yourself with the changing tides, the personality of beach breaks, or any safe zones at the beach. Also, knowing the depth of water you’re swimming in can prevent you from harming yourself or scratching your equipment. As simple as it may sound, the ocean has the ability to take a 180 turn in a matter of seconds. Common knowledge and understanding of its unpredictability is only the fist step in producing beautiful images of the ocean.
Choosing the right equipment for photographing images from inside the ocean.
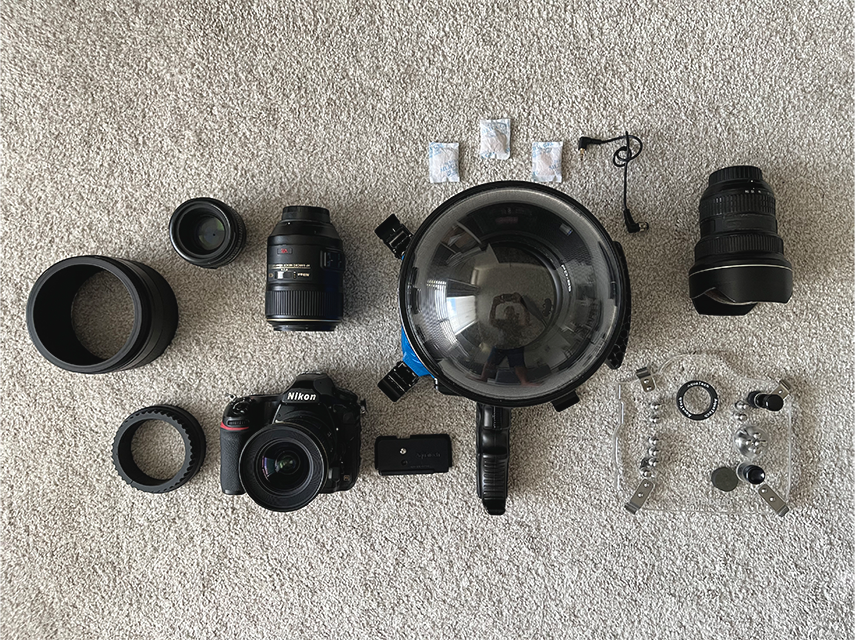
When capturing images of the ocean while submersed in the water, you need to choose the right equipment. Because digital cameras are, well, digital, you need a waterproofing system to protect your camera in the water. Each waterproof system is unique and specific to your camera brand, model and lens.
Waterproof systems are tools that allow you to photograph images of the ocean from inside the water.
1. Waterproof Housing
This encases your camera and keeps it dry from ocean water. You’ll need to attach a plate on the bottom of your camera in order to secure it inside.
2. Lens Port
A lens port is specific your lens and is attached to the front of your housing. It allows you to get the full range of your lens’ focal length. Dome-shaped ports are also available to capture cool under-over shots.
3. Back Plate
A back plate is attached to the rear of your housing and has buttons that allow you to use the functionalities of your camera. This is what locks your camera in place and keeps your camera dry.
Optional Accessories
Some optional accessories include:
- Speedlight Housings
- Shutter Grips
Speedliight housings allow you to connect a speedlight to the top of the housing where as a Shutter Grip is attached to the bottom of the housing and acts as a trigger to activate your shutter release.
Choosing the right equipment is crucial in protecting your camera and lens in the water. Mine is made by Aquatech Imaging Solutions. They offer a ton of housing’s catered to all consumer cameras with lens ports, and accessories. In addition, discounted deals are given throughout the year. Aside from waterproof equipment, prepping yourself before heading into the water will be discussed next.
Optional Equipment for taking photos from inside of the water
My Underwater Equipment List:
Aquatech Elite II Sports Housing
Shutter Grip V2
50mm f/1.4
20mm f/1.8
105mm VR f/2.8
14-24 f/2.8 (Great for calm conditions)
Mentally and Physically Preparing Yourself
The next step in photographing images from inside the water is to be mentally and physically prepared. Swimming in the ocean with a heavy camera in your hand, requires you to have endurance. It’s important to know your physical abilities before setting foot in the water.
Physical preparation is simple. You can do this by constantly swimming until you’re tired and breathing out of your nose instead of your mouth when you need to rest for air. Or by diving underwater for long periods of time and breathing slowing when you get back up.
Check out this article for more on training yourself to hold your breath longer underwater.
You can prepare your mind by practicing meditative techniques before heading out into the ocean. This can be helpful photographing big surf in the water. Additionally, stay calm in the water and don’t panic if the undertow prevents you from resurfacing. Being physically or mentally stressed is the last thing you want to do when attempting to create images from inside of the ocean.
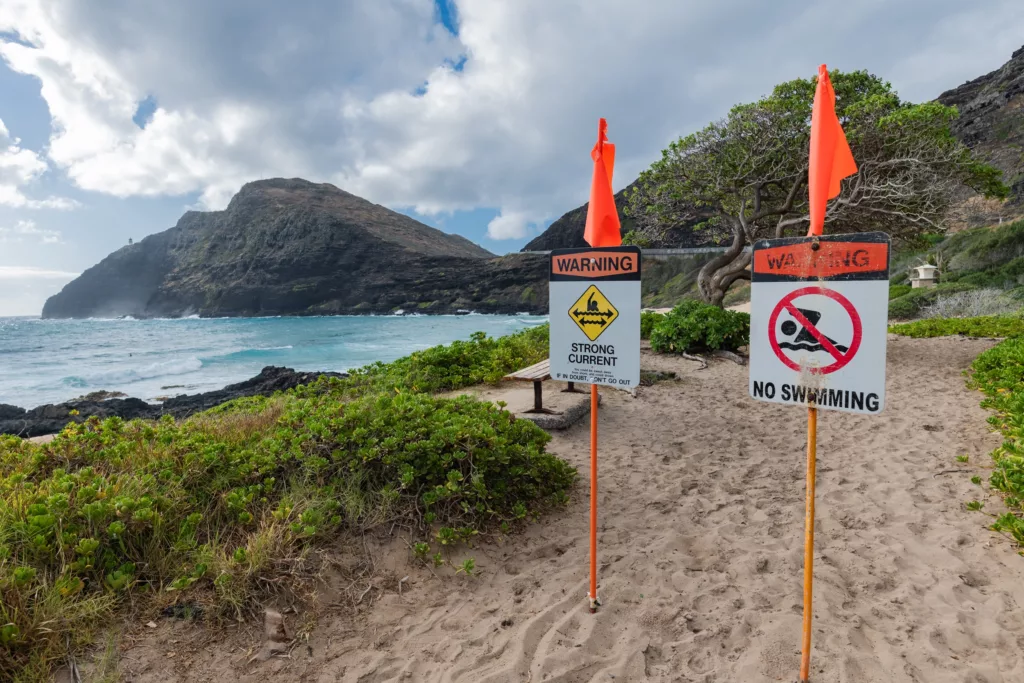
Staying Safe in the Ocean
You number one concern when photographing inside of the ocean should always be your safety. Familiarize yourself with the ocean, the waves, and the tides. Keep an eye out for currents that look sketchy from the shoreline and be aware of surfers or marine life that are also in the water. Dive deep in between sets, but know whats underneath beforehand so you don’t end up bumping your head into the reef. By staying safe in the ocean, you’ll also be helping lifeguards from having to risk their lives trying to save you. And remember, when in doubt, DON’T GO OUT!
Recommended Camera Settings for photographing beautiful images from inside of the ocean.
In this next section, I’ll go over some of the recommended camera settings for photographing images inside the ocean.
Camera Modes
Like most photographic situations, personal preference can also be used when shooting inside of the ocean. I prefer using manual mode because it gives the best control when exposing for an image. A recommended shutter speed of 1/1000 sec is usually best for capturing the motion of the ocean.
Shutter Speed
As mentioned, a shutter speed of 1/1000 sec or faster is best when photographing images from inside of the ocean. This allows you to capture the speed and fluidity of the waters and prevents motion blur. However, based on your concept or style, choose any as you please. Experiment with different shutter speed settings and use what you feel works best for you.
Aperture
In addition to shutter speed, you aperture settings can come into mind. I personally shoot with a narrow aperture settings between f/11 -f/16. This produces the sharpest image quality regardless of the type of camera or lens you use. To reiterate, your choice of settings are a personal preference. So there’s no right or wrong aperture setting to use when you’re shooting from inside the water. What matters is getting a shot that’s exposed correctly.
ISO
I recommend to use the lowest ISO possible if you’re shooting subjects where your camera is out of the water. Underwater can be different since there’s less light penetration through the surface. Try not to use ISO settings that are higher than 1600 to prevent too much noise in your pictures.
White Balance
White Balance settings can be a bit tricky if you’re shooting underwater. Due to the nature of the ocean, colors tend to come out abnormal compared to reality. Because of that I usually set my white balance to AUTO and do color-correction in post-production.
To wrap up this section, just shoot with fast shutter speeds 1/1000 sec+ and apertures of f/11-f/16 to get the sharpest images. Instead, focus yourself on capturing the moments that life presents to you when you’re out taking photos inside of the ocean.
For more tips on photography settings, check out this article .
What focus settings should you use when shooting from inside of the ocean?
In this section, we’ll go over the different focus settings that will help you when you shoot inside of the ocean. The two are Focus Modes and Focus Areas.
Focus Modes
There are two different focus settings most cameras come with. These two are Focus Modes and Focus Areas. Focus Modes control the way your lens focuses on your subject where as Focus Areas control it area of focus.
Single Autofocus
Single auto focus (AF-S/One-Shot AF) is very basic. It allows you to lock focus on a single focus point, but don’t adjust if your subject moves. A lot of movement occurs in the ocean and because of that, I usually don’t recommend using this setting.
Continuous Autofocus
Continuous autofocus (AF-C/AI-Servo) is best when capturing anything that’s moving fast. You select a focus point and automatically tracks subjects if it moves. This includes marine life and waves. Depending on the capabilities of you camera, this can be well suited for photographing inside of the ocean. I recommend using this setting.
Manual Focus
Manual focusing can also be an option when shooting inside the water. However, you need to set your focus before locking your camera inside of your waterproof housing. Just set your focus ring to 3ft in front of you or to infinity to get in-focus shots of inside a barreling wave.
Focus Areas
The advantage of Focus Areas depend on your digital camera’s capabilities. Autofocus settings allow you select what you want to focus. Where as, Focus Areas allow you to select an areas in which your AF will be dedicated to focusing on. It’s a broad topic so I won’t get into too much details. However, I do recommend to use an Autofocus areas with the maximum # of focal points for shooting waves. To read more on autofocus areas, check out this article.
Color Settings
Colors play a huge role when it comes to photography. Bright and vivid colors can bring life into your images and make certain things stand out from the rest. Muted colors can make a scene feel moody. I’ll keep this brief as I recommend to use color at your own discretion. Instead of going through the basics of color, here are some things you should consider when photographing images from inside the ocean:
- Blues become are prominent in the ocean because of the lack of light penetration.
- Most cameras get confused in what is white in your image thus throwing off your white balance almost 99% of the time.
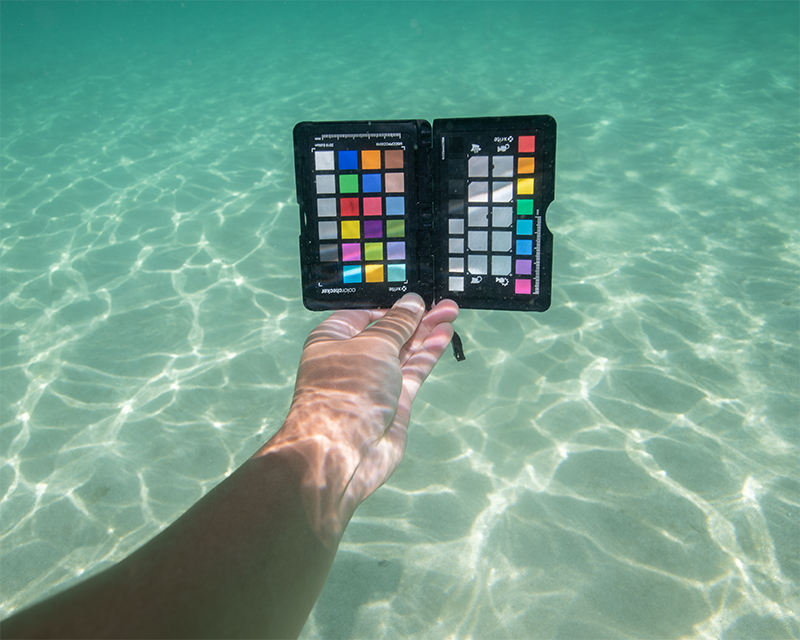
- Color-correcting filters are an option to get accurate colors underwater.
- Post Production is your best friend when creating images underwater.
- Color Correction Cards work great to create a custom WB underwater just as long as its waterproof. My favorite is this ColorCheck Passport.

Awareness in the Ocean
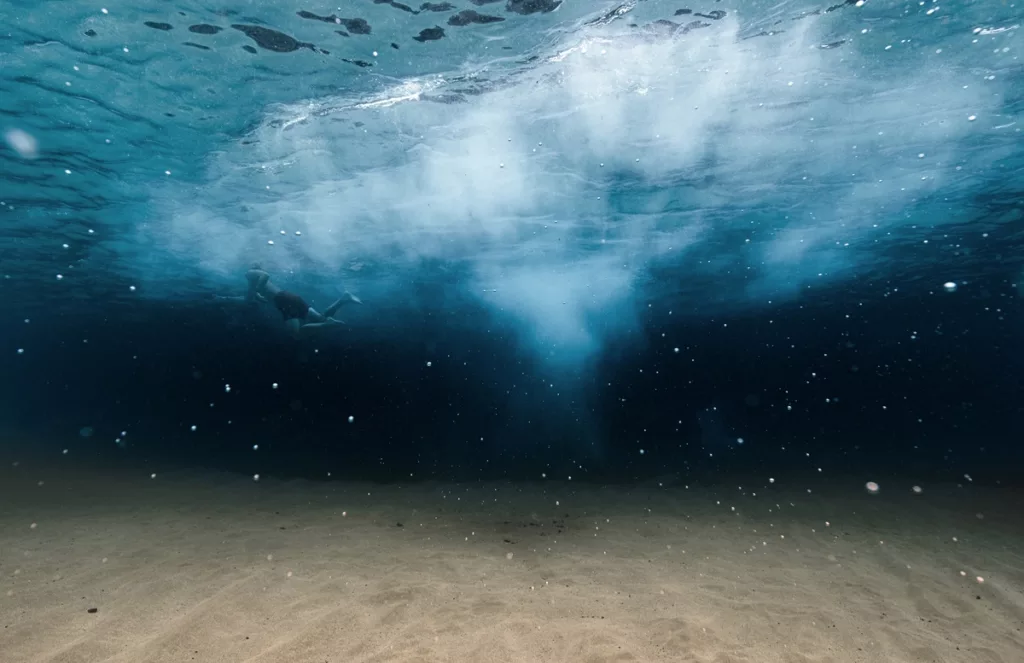
There’s a lot going on when you photograph images from inside of the ocean. Waves can come and go without warning, marine life can show up, and can go unnoticed by surfers dropping into barreling waves. You need to have a keen sense of awareness doing this type of photography.
Anticipating sets rolling in or the movements of marine life can help keep you safe in the water and allow you get the shot you’ve already pre-visualized.
Capturing images of waves from inside of the ocean, to me, is like the olympics for photography. You not only have to swim out with heavy equipment, but you must position yourself right inside the barrel, hold still, compose, focus, and finally press the shutter. All before diving under so you don’t get thrown over the falls of a wave. Additionally, you must hold your breath long enough, dive deep enough, (to get under the currents of the wave) swim back up, and do it all over again. Worst part is you’re only left with only a handful of shots out of the 1000+ images you took during a single session in the water.
In other words, being fully aware while shooting inside of the ocean translates to being safe. Stay aware and know your surroundings at all times. Anticipate movements and never swim out if you have any doubts.
Cleaning your equipment after getting out of the ocean
The ocean has a ton of salt that can leave your equipment prone to getting salt build up or rust on metal. Cleaning your equipment should be done as soon as you get out from shooting inside the water.
Cleaning is simple. All you have to do is run your waterproof system under fresh water while pressing and pulling all the knobs and buttons o your back plate, housing and/or accessories. Be careful not to release any of the latches if your camera is still inside.
Next, you want to wipe it down completely. This prevents water spots on. your dome and keeps it clean.
Lastly, keep it in a dry area with plenty of circulation, inside of a dry box, or placed into a bag with silica packets that absorb moisture.
Closing Words
Photographing images from inside of the ocean requires a very unique set of skills and mindset. With the tips and knowledge provided in this article, I hope you’ll better understand what it takes to elevate your nature photography work. Familiarizing yourself with the necessary equipment, along with mental and physical preparation is key to jumpstarting your adventure into ocean photography. Just be sure to stay safe and always be aware of your abilities before stepping foot into this one-of-a-kind genre of photography. If you have any questions or comments on photographing images from inside of the ocean, feel free to reach out to me at info@raymondenriquez.com
Now go out there and start creating!