Digital Cameras have introduced an endless array of possibilities that have improved the output quality of images. Even when it comes to printing. Matching print colors with digital colors can seem impossible. I’m here to tell you it’s not! Here are some tips on preparing for perfect photography prints:
1. Calibrate your Monitor
Calibrating your monitor allows for your screen to produce the correct color spectrum that the human eyes are meant to see. Those colors are a combination of red, green, and blue.
This color spectrum can differ across digital peripherals. Your computer screen, camera, and printer need to have the same standard of color in order for all of them to be in sync with each other.
If outputs of your image don’t share the same standard of color, they will produce unmatched colors. This sometimes leads to color shifts when comparing digital files to prints/other devices.
To calibrate a computer monitor you need a spectromer. Devices like the Spyder X measures variations of colors, contrast and brightness levels. Its software then adjusts the screen’s color according to the standardized RGB color model and saves it automatically.
If you want the colors of your photographs to match across devices, I highly recommend doing this.
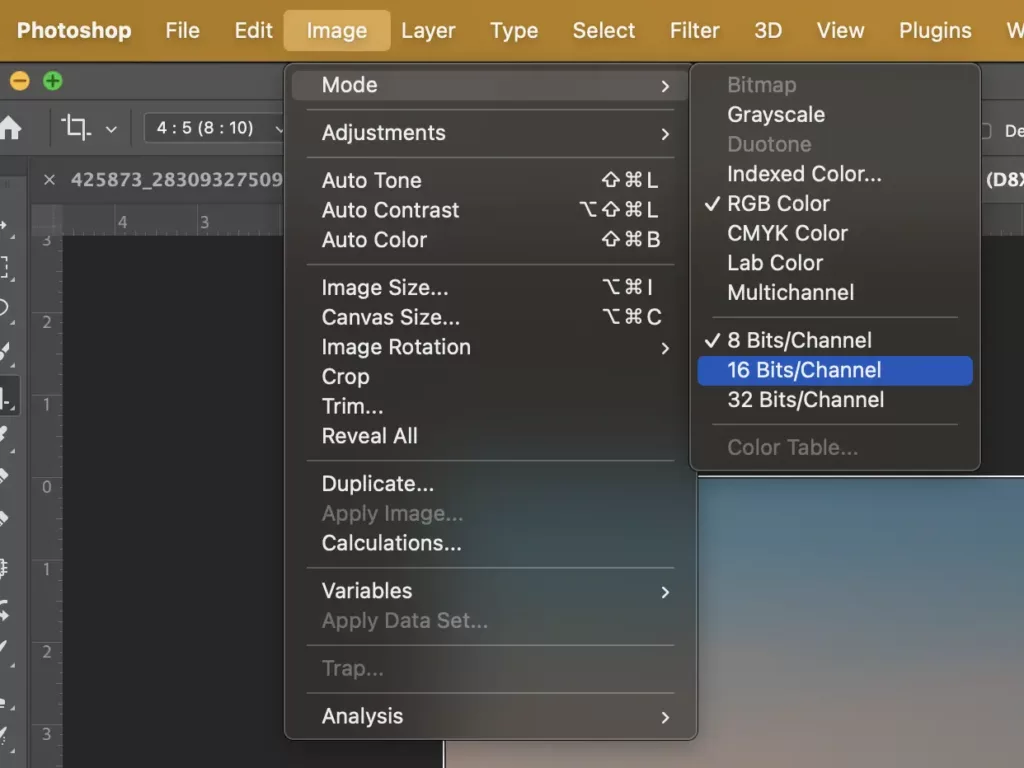
2. Set your Color Space to RGB & Bit-Depth Mode to 16-bits/channel
Another way of preparing for perfect photography prints is through color and bit-depth. The color space of an image specifies color channels and make up the colors you see in an image. Bit-depth modes designate the range of tonal values within an each color channel. The higher the bit-depth, the wider range of tones you get from a color channel.
Why is this Important?
If you want to get the best out of your images, you want the most valuable information stored in it.
Think of a digital image file as a sponge that has water stored in it. Digital camera’s capture that “water”. It makes up what you see in a photo and interprets the values recorded on pixels as different shades of color.
High quality printing is like squeezing as much “water” as you can out of a sponge. You want to give the most file information to your printer. By allowing your file to have the widest tonal range possible, you allow for a higher quality output.
Color Modes
Photoshop has an array of color models you can work in. The most commonly used are RGB and CMYK.
RGB is typically used for digital devices since its what human eyes can accurately interpret. The CMYK Color model is commonly used for printing. Digital cameras record in RGB by default.
RGB
Set your color mode to RGB if you want high quality prints. This provides the widest range (aka “gamut“) of colors for digital devices and is less data-consuming than CMYK. I suggest doing this prior to adjusting images you plan to print.
What Bit Mode to Choose?
There are two main bit-modes per channel (aka Bit Depth) for image files. The first is 8-bit/channel and the second is 16-bit/channel. Bit-depth correlate directly with color spaces.
Going into further details on this subject be can time consuming so check out Adobe’s article for more info on this subject.
I personally suggest to choose 16-bits/channel before sending it out to a printer.
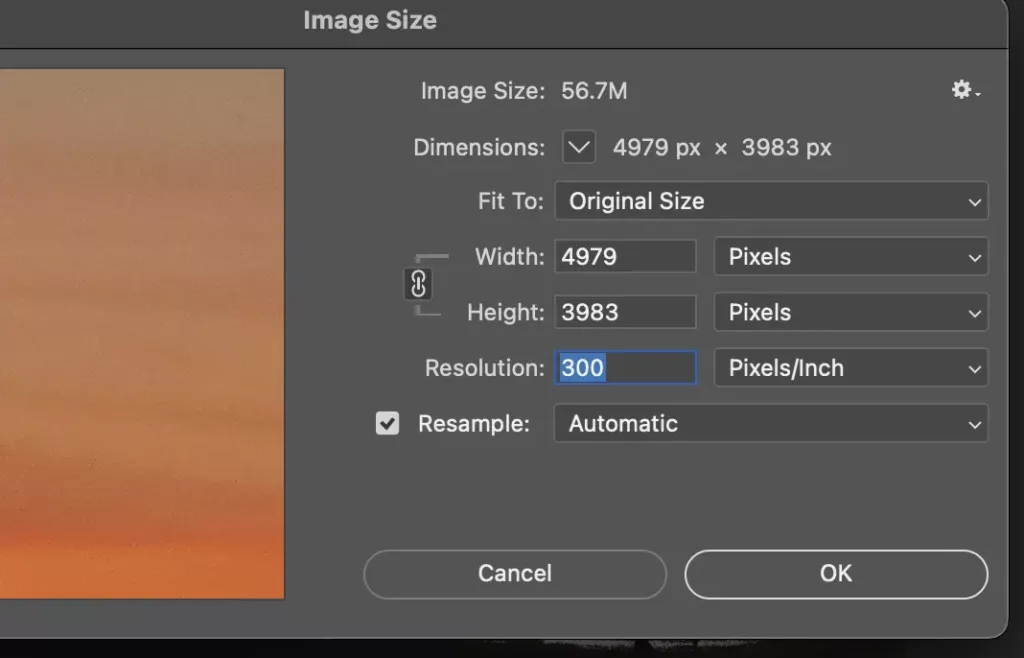
3. Set Your Images to 300 PPi/DPi or Above
PPI (Pixels per inch) and DPI (Dots per inch) are measurements of your image’s resolution. Both terms are interchangeable. When it comes to printing, check your printer’s maximum resolution. This is measured as DPI and lets you know its printing capabilities.
The standard for printing high quality prints is a resolution of 300 PPI.
If your printer can produce more, set your image’s resolution to that number.
To adjust this in Adobe Photoshop, go to “Image>Image Size” and adjust the “Resolution”.

4. Print Proofs Before Printing Editing
Print Proofing (aka Soft Proofing) is another term for being able to view your image on the screen as close as it would look like on print.
The way your proof will look depends on the printer and the type of paper you print on. Knowing these two things before adjusting your image, can drastically improve your workflow.
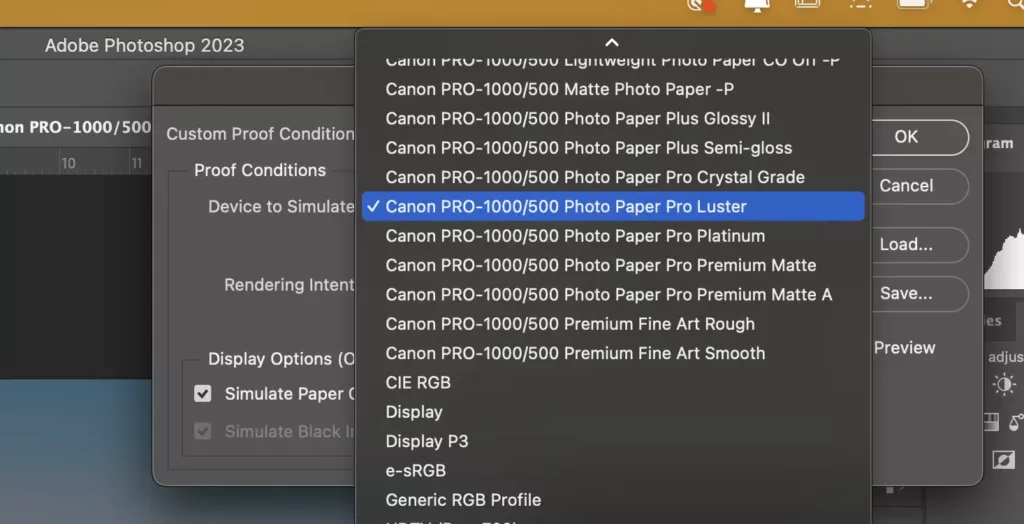
First, you need the correct ICC profile for your printer and paper. You can get these from a printer’s manufacturer website which vary based on the model and paper type.
Second, in Photoshop’s top menu , go to “View> Proof Setup> Custom…” and set it to the correct ICC profile. You can select this by using the “Device to Simulate” drop-down menu.
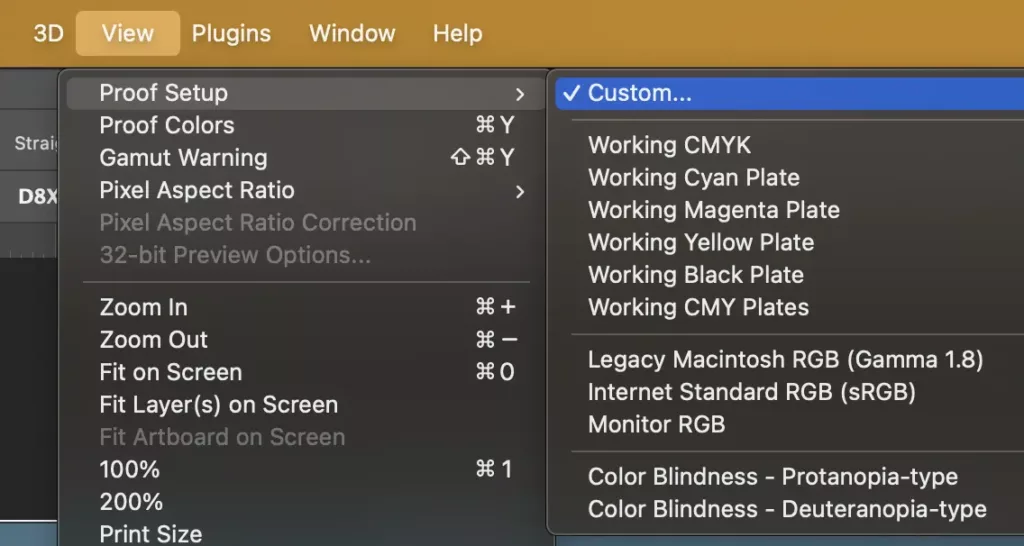
Next, Choose “View> Proof Colors” to view your image as a proof.
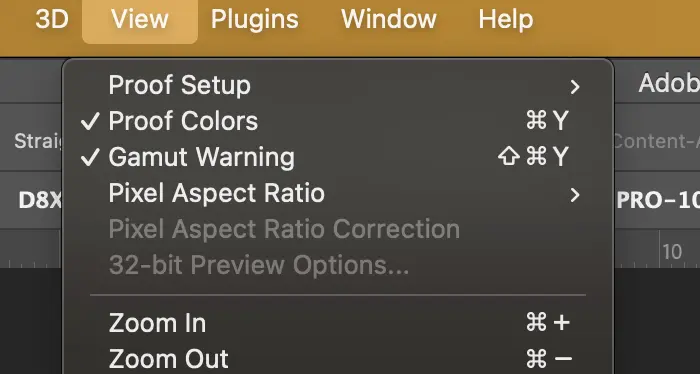
You will now be able to view your image on screen, as it would look on a print. (You can also select “Gamut Warning” to see what parts of your image are outside of your printer’s gamut range.) Out-of-gamut sections of your image will marked in gray.
5. Let Photoshop Manage Color
This a crucial step when preparing for perfect photography prints. That is, if you plan to print with your own printer.
In the Print Dialog box in Photoshop, there are two options under the “Color Handling” drop-down menu. The first is “Printer Manages Color” and the second is “Photoshop Manages Color”.
If you allow the printer to manage color, it uses its own standards for printing and your photo will not match the aspects of your image on-screen.
Select “Photoshop Manages Color”.
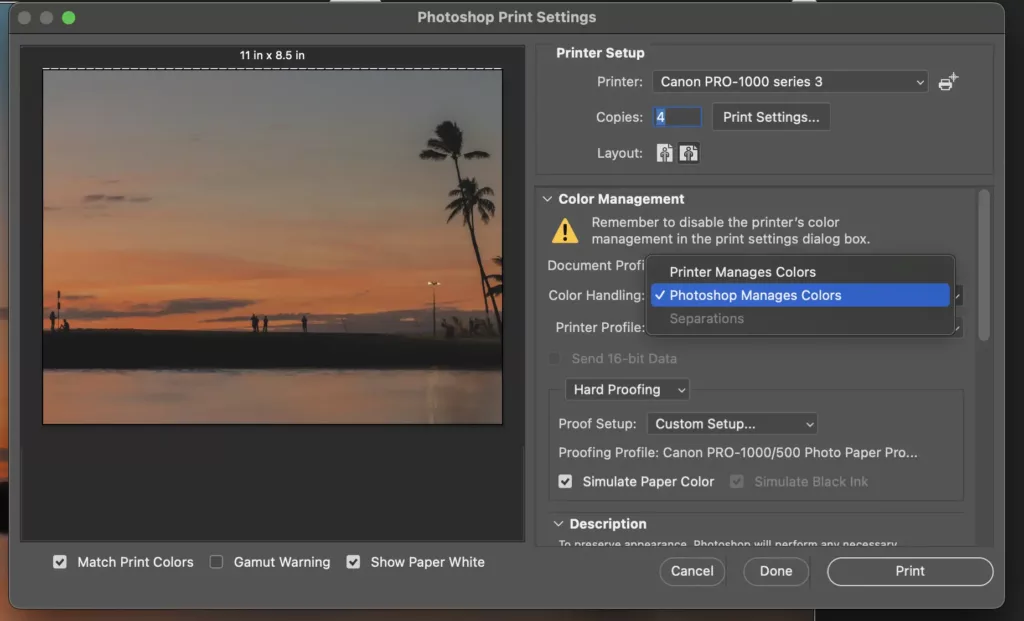
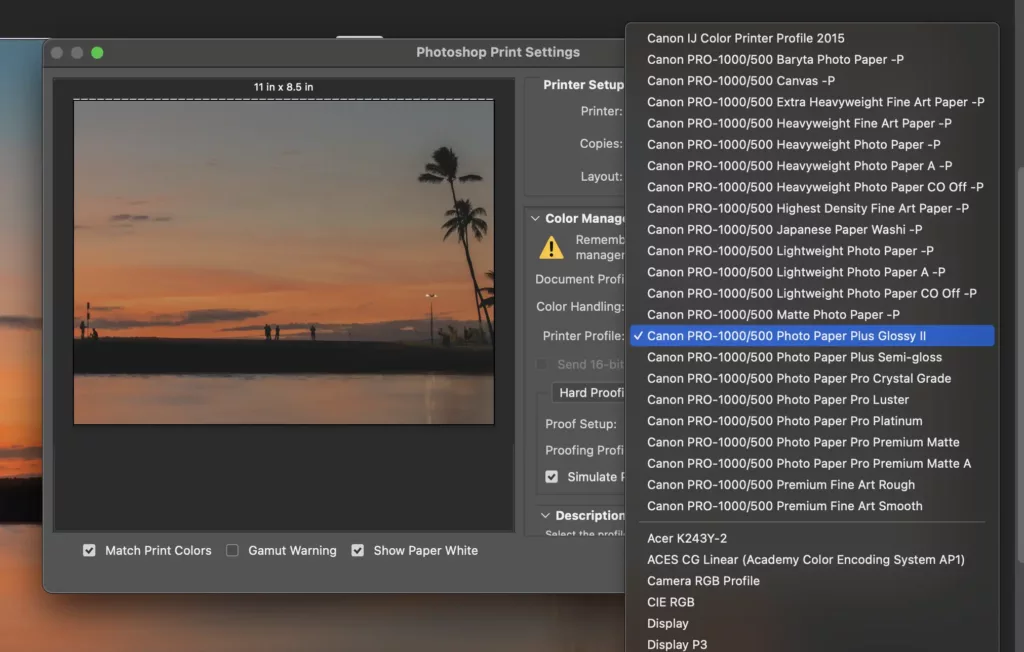
By letting Photoshop manage the colors, you’re able to choose the ICC Profile of the type of photo paper you will use and send the file’s 16-bit data to the printer. Don’t forget to select “Hard Proofing” so you can proof your image once again before sending it to the printer.
Whether you want to print your own photographs or want to prepare for a photography show or competition, these simple steps can get you on the right path to perfect prints.
Now you know how to prepare your files for the perfect photography print, let me know what you think about this post. Was it helpful? How did your prints turn out after following these simple steps? Email me! info@admin
Need help with you photogrpahy? Check out my Must-know tips for beginner photographers!
Pingback: Submitting your Photography Work to Grow Your Audience - The Blog
Pingback: Creating a Photography Portfolio that Stands Out
Pingback: Submitting your Photography Work to Grow Your Audience
Pingback: How to Prepare for a Photography Show or Competition
Pingback: Bonus Tips for Beginner Photographers - Raymond Enriquez Photography %